Support and resistance zones built from confirmed pivots, scored 0-100, with their state and role in real time
Don't have TradingView yet? Sign up here and get $15 off your next plan.
Affiliate link
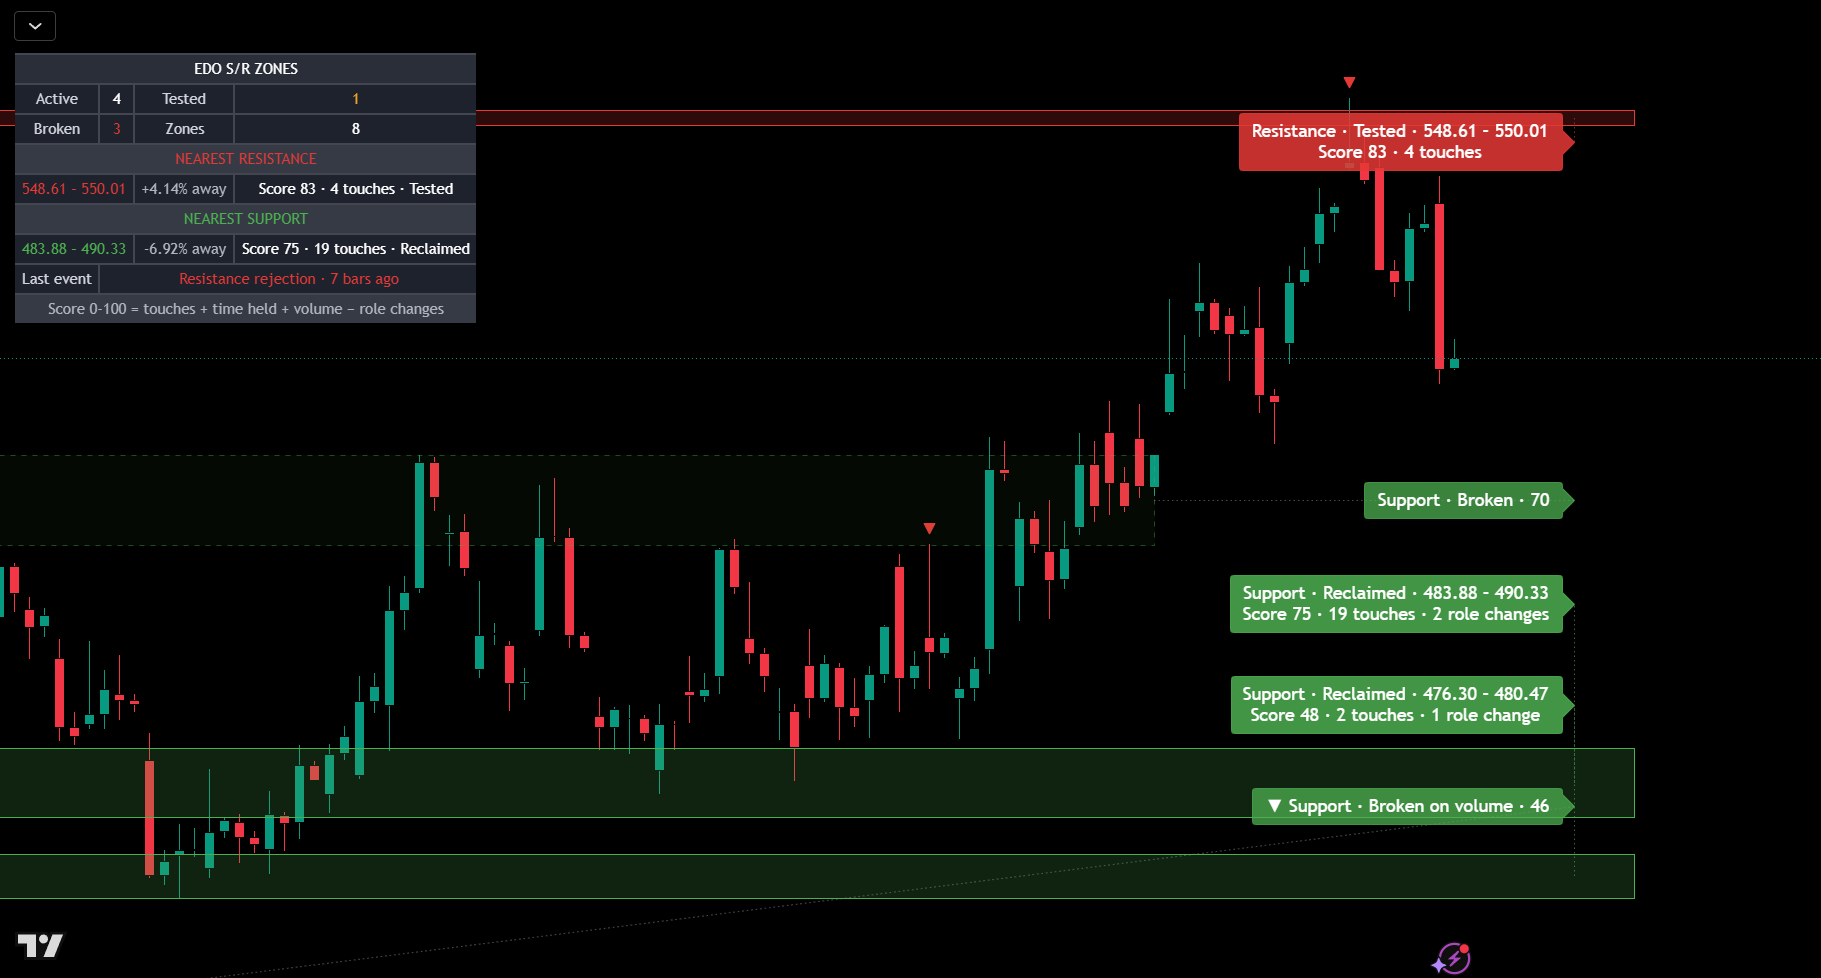 1 / 8
1 / 8
Edo S/R Zones draws on the chart the support and resistance zones the market has genuinely respected. It does not start from a hand-drawn level or from a moving average: it starts from the chart's confirmed pivots, gathers those that fall at the same height into a single zone measured in ATR, and fits the inner edge of each zone to the nearest volume node, so the zone sits where trading really took place. Every zone is scored from 0 to 100 by how many times price has respected it, how long it has stood, how much volume built it and how many times it has changed role, and it carries a state — Active, Tested, Reclaimed or Broken — and a role that flips between support and resistance depending on where price is. Around the zones the indicator marks two observable facts, rejections and retests after a break, and a panel points to the nearest resistance above price and the nearest support below it with the percentage distance to each. Pivots are used once confirmed, and every state, mark and alert is decided on the close of the candle, so nothing repaints. The marks are context for reading the level, not entry signals.
Edo S/R Zones groups its inputs in four blocks. Zones sets the Pivot Length (10), the Zone Lifetime (750 bars), the Cluster Tolerance (1.0 x ATR), the Min Touches to Show (2), the Max Zones (8), whether to keep broken zones, the Extend Zones projection (12 bars), the Volume Node Snap (1.0 x ATR, 0 turns it off), the Volume Profile Bars (100), the Role Change Penalty (8 points) and the High Volume threshold (1.2 x the 50-bar average). Signals sets how many of the nearest zones can mark a rejection (2) and whether to show retests after a break, with a minimum spacing between marks. Style sets the zone opacity, the labels and their size, and the Dark or Light theme. Panel sets the detail (Full or Compact), the position and size, and keeps the panel off the zones by choosing the corner that covers the least. The defaults are calibrated to work without adjustments on any market and timeframe; the inputs most often adjusted are the pivot length, to match the trading horizon, and the cluster tolerance, to get thinner or wider zones.
Trading involves risk. This indicator is an analysis tool and does not constitute financial advice, investment recommendations, or trading signals. The user is solely responsible for their trading decisions.
