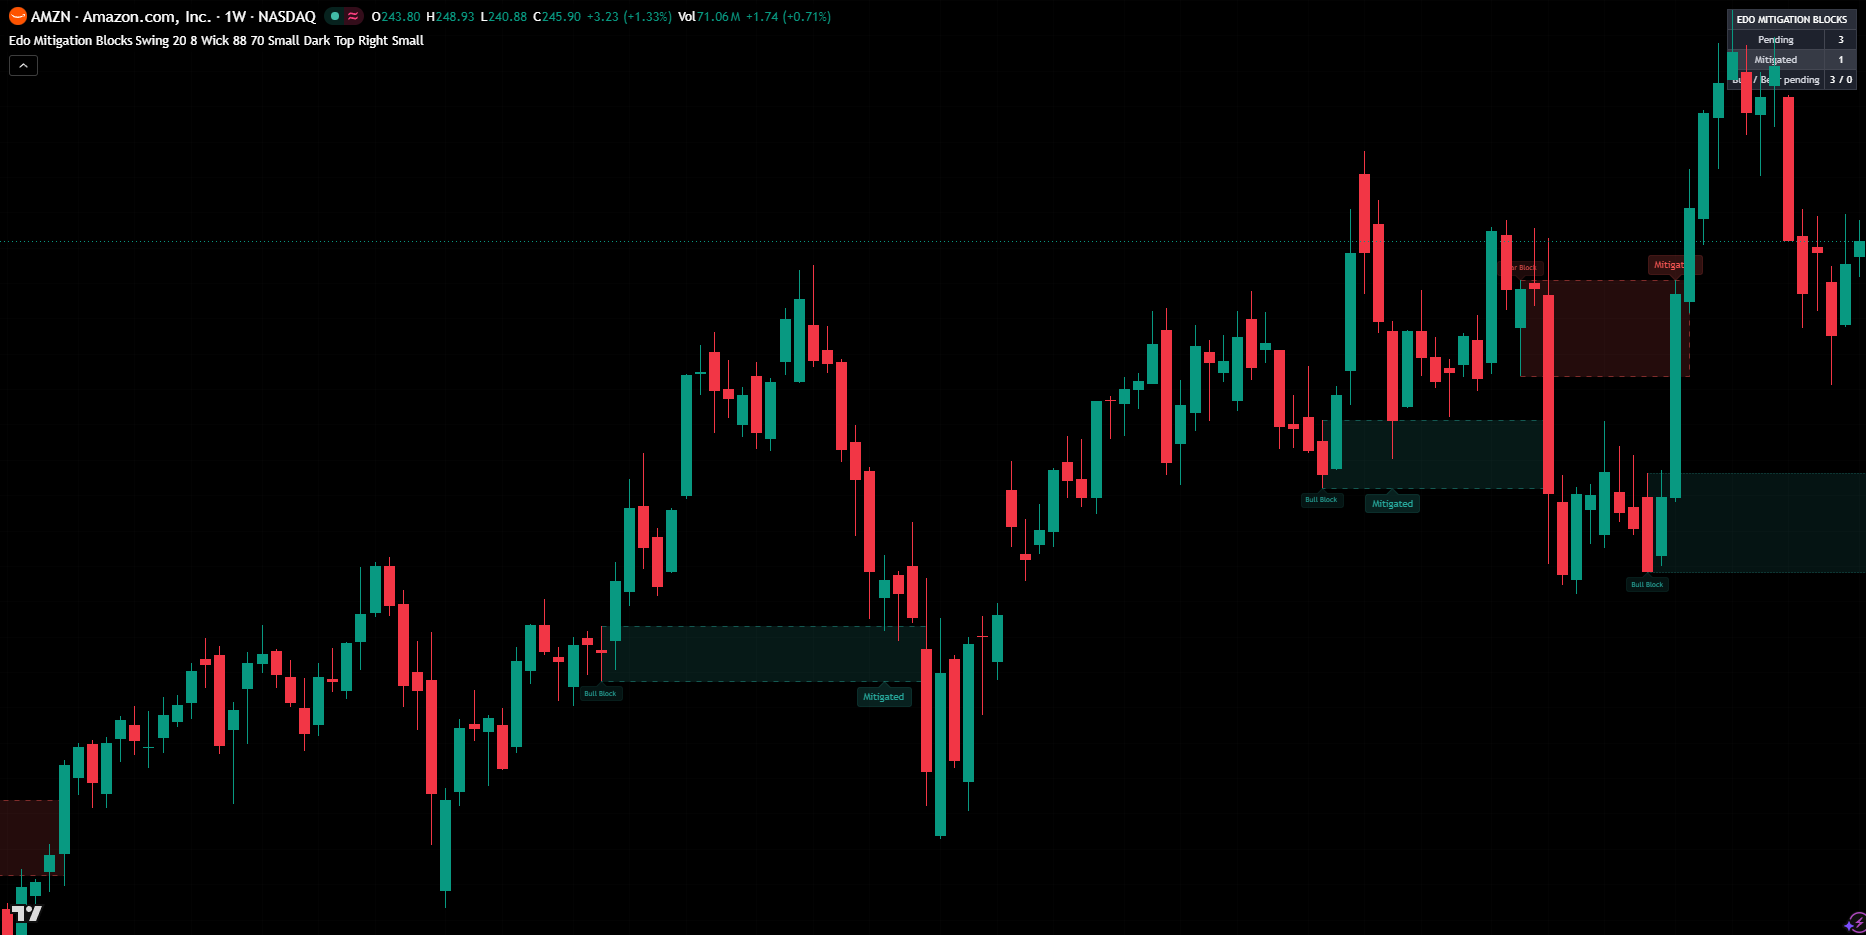
The order block behind each impulse, tracked to its retest as Pending, Mitigated or Broken
 1 / 6
1 / 6
Edo Mitigation Blocks follows the order block through the moment that matters most in its life: mitigation, when price comes back to the zone it started from. When a large order moves price it is rarely filled all at once, and part of it is left behind in the origin zone — the order block. The indicator draws that block the moment the impulse breaks structure, as a Bull Block in teal (demand) or a Bear Block in red (supply), dimmed and with a dotted border while it waits for its retest. When price returns into the zone, per the Wick or Close trigger you choose, the block is highlighted with a solid border and a Mitigated label: that first return is where the reaction usually happens. If price later closes through the far side of a mitigated block, it turns Broken, the border goes dashed and the box stops extending. A compact panel counts the pending and mitigated blocks and splits the pending ones by side. No higher-timeframe functions and no repainting.
Three tools that work well alongside this one.
 FREE
Structure
Edo Premium Discount
Premium, Discount and Equilibrium Zones from Confirmed Swing Structure
FREE
Structure
Edo Premium Discount
Premium, Discount and Equilibrium Zones from Confirmed Swing Structure
 FREE
Structure
Edo Swing Levels
The last swing high and low always in view, with the Strong level that defends the trend set apart from the Weak one
FREE
Structure
Edo Swing Levels
The last swing high and low always in view, with the Strong level that defends the trend set apart from the Weak one
 FREE
Structure
Edo Breaker Blocks
Only the order blocks that fail and flip their role, each breaker tracked as Active, Tested or Failed
FREE
Structure
Edo Breaker Blocks
Only the order blocks that fail and flip their role, each breaker tracked as Active, Tested or Failed
Edo Mitigation Blocks groups its inputs by block. Structure sets the Structure Profile (Scalper, 5 bars each side, for short-term blocks on lower timeframes; Swing, 10, the default, for the balanced 4H and daily read; or Long Term, 21, for the major blocks on weekly and wider horizons), the Impulse Lookback (20, range 3-60: how many bars back the indicator searches for the candle that originated the impulse), the Max Blocks per side (8, range 1-30) and the Mitigation trigger (Wick, the default, or Close). Style exposes the bullish block colour (teal, demand), the bearish block colour (red, supply), the Pending opacity (88 %), the Mitigated opacity (70 %), the label size (Small, from Tiny / Small / Normal) and the theme (Dark or Light). Panel controls panel visibility (on), position (Top Right, from the four chart corners) and size (Small). Three alerts are available: Bullish Block mitigated and Bearish Block mitigated when price returns to a demand or supply zone, and Block broken when an already-mitigated block is lost, all validated on bar close.
Trading involves risk. This indicator is an analysis tool and does not constitute financial advice, investment recommendations, or trading signals. The user is solely responsible for their trading decisions.
